
Animal Research Resources
I designed a variety of animal research booklets for students to record research facts and information in during an animal research unit. Here is a preview of a few pages of the booklets.


Animal Research Lesson Ideas
I introduced students to each Canadian Animal, showed them photos, shared a few basic facts, and short clips. The students then made a list in order from most interested to least interested animal to study. I then collected the preferences and created groups. Students were given specific animal booklets, baskets of age and skill level appropriate resources, and were taught basic research skills. Students were given a day to explore and read materials and personalize the front page of the booklets. The next few days students were in charge of reading the books and finding research facts they wanted to record in large grid paper boxes. One day would be devoted to finding food facts, habitat facts, appearance facts, fun facts, or what they thought was important. Another day we cut up our facts and sorted and glued them down to a facts sheet. Other days we used our facts to formulate sentences to record in our booklets. We also used our research materials and photographs to illustrate the booklets. The final product was around 4 complete sentences per page regarding the question or topic. The students were engaged throughout the process, and it was beneficial for them to learn and demonstrate research skills, sorting facts into categories and like ideas, and formulating complete sentences. The students were motivated because they were learning facts that interested them, an all time favourite was finding facts to go in the fun facts section, and sharing these with peers during our snowball activity. During the snowball activity, students wrote a Who Am I question: Example I have two talons instead of feet, and bald head of white feathers. Who am I? Answer: Bald Eagle. Next step was for them to write the answer on the back and crumple the question up. They then were able to toss them into the center of the class, and go retrieve a snowball. Students took turns reading and guessing, we had some great laughs as a class. (Teacher note, remind class the Who am I animals picked for the game clues must be one of the animals researched in class).
Animal Habitat Artwork Project
One of the students favourite experiential education activities was going on a walkabout around the school yard to find habitat materials. Students were given ziplocks and instructed to find materials that could be used to recreate their animals natural habitat, ie sticks, grass, leaves, pebbles etc. Through a class discussion we made rules that indicated we would not collect living materials, we would only collect items that were already on the ground. After our walkabout using our senses and hands on learning. We created our habitats in the classroom on thick poster board, and lots of white school glue. (Teacher tip, the more white glue the better, apply liberally with a paintbrush, or dribble over top of habitat later, it dries clear,. The more the better if you want to hang on bulletin boards.) Later in the week we made small water colour animal paintings to put on pop ups and add to our habitats. The final product looked very natural and brought a lot of depth and character to our Animal Research bulletin board. The students had a lot of fun, and connected and demonstrated research skills and knowledge with this hands-on art project.
Canada Unit
 During my Canada Unit one of the students favorite activity was singing Canada in my Pocket, we even had the opportunity to add actions to our song and perform it for others. If you have a primary class, I would highly suggest integrating this song into your classroom activities.
Check out the following Youtube video:
During my Canada Unit one of the students favorite activity was singing Canada in my Pocket, we even had the opportunity to add actions to our song and perform it for others. If you have a primary class, I would highly suggest integrating this song into your classroom activities.
Check out the following Youtube video:
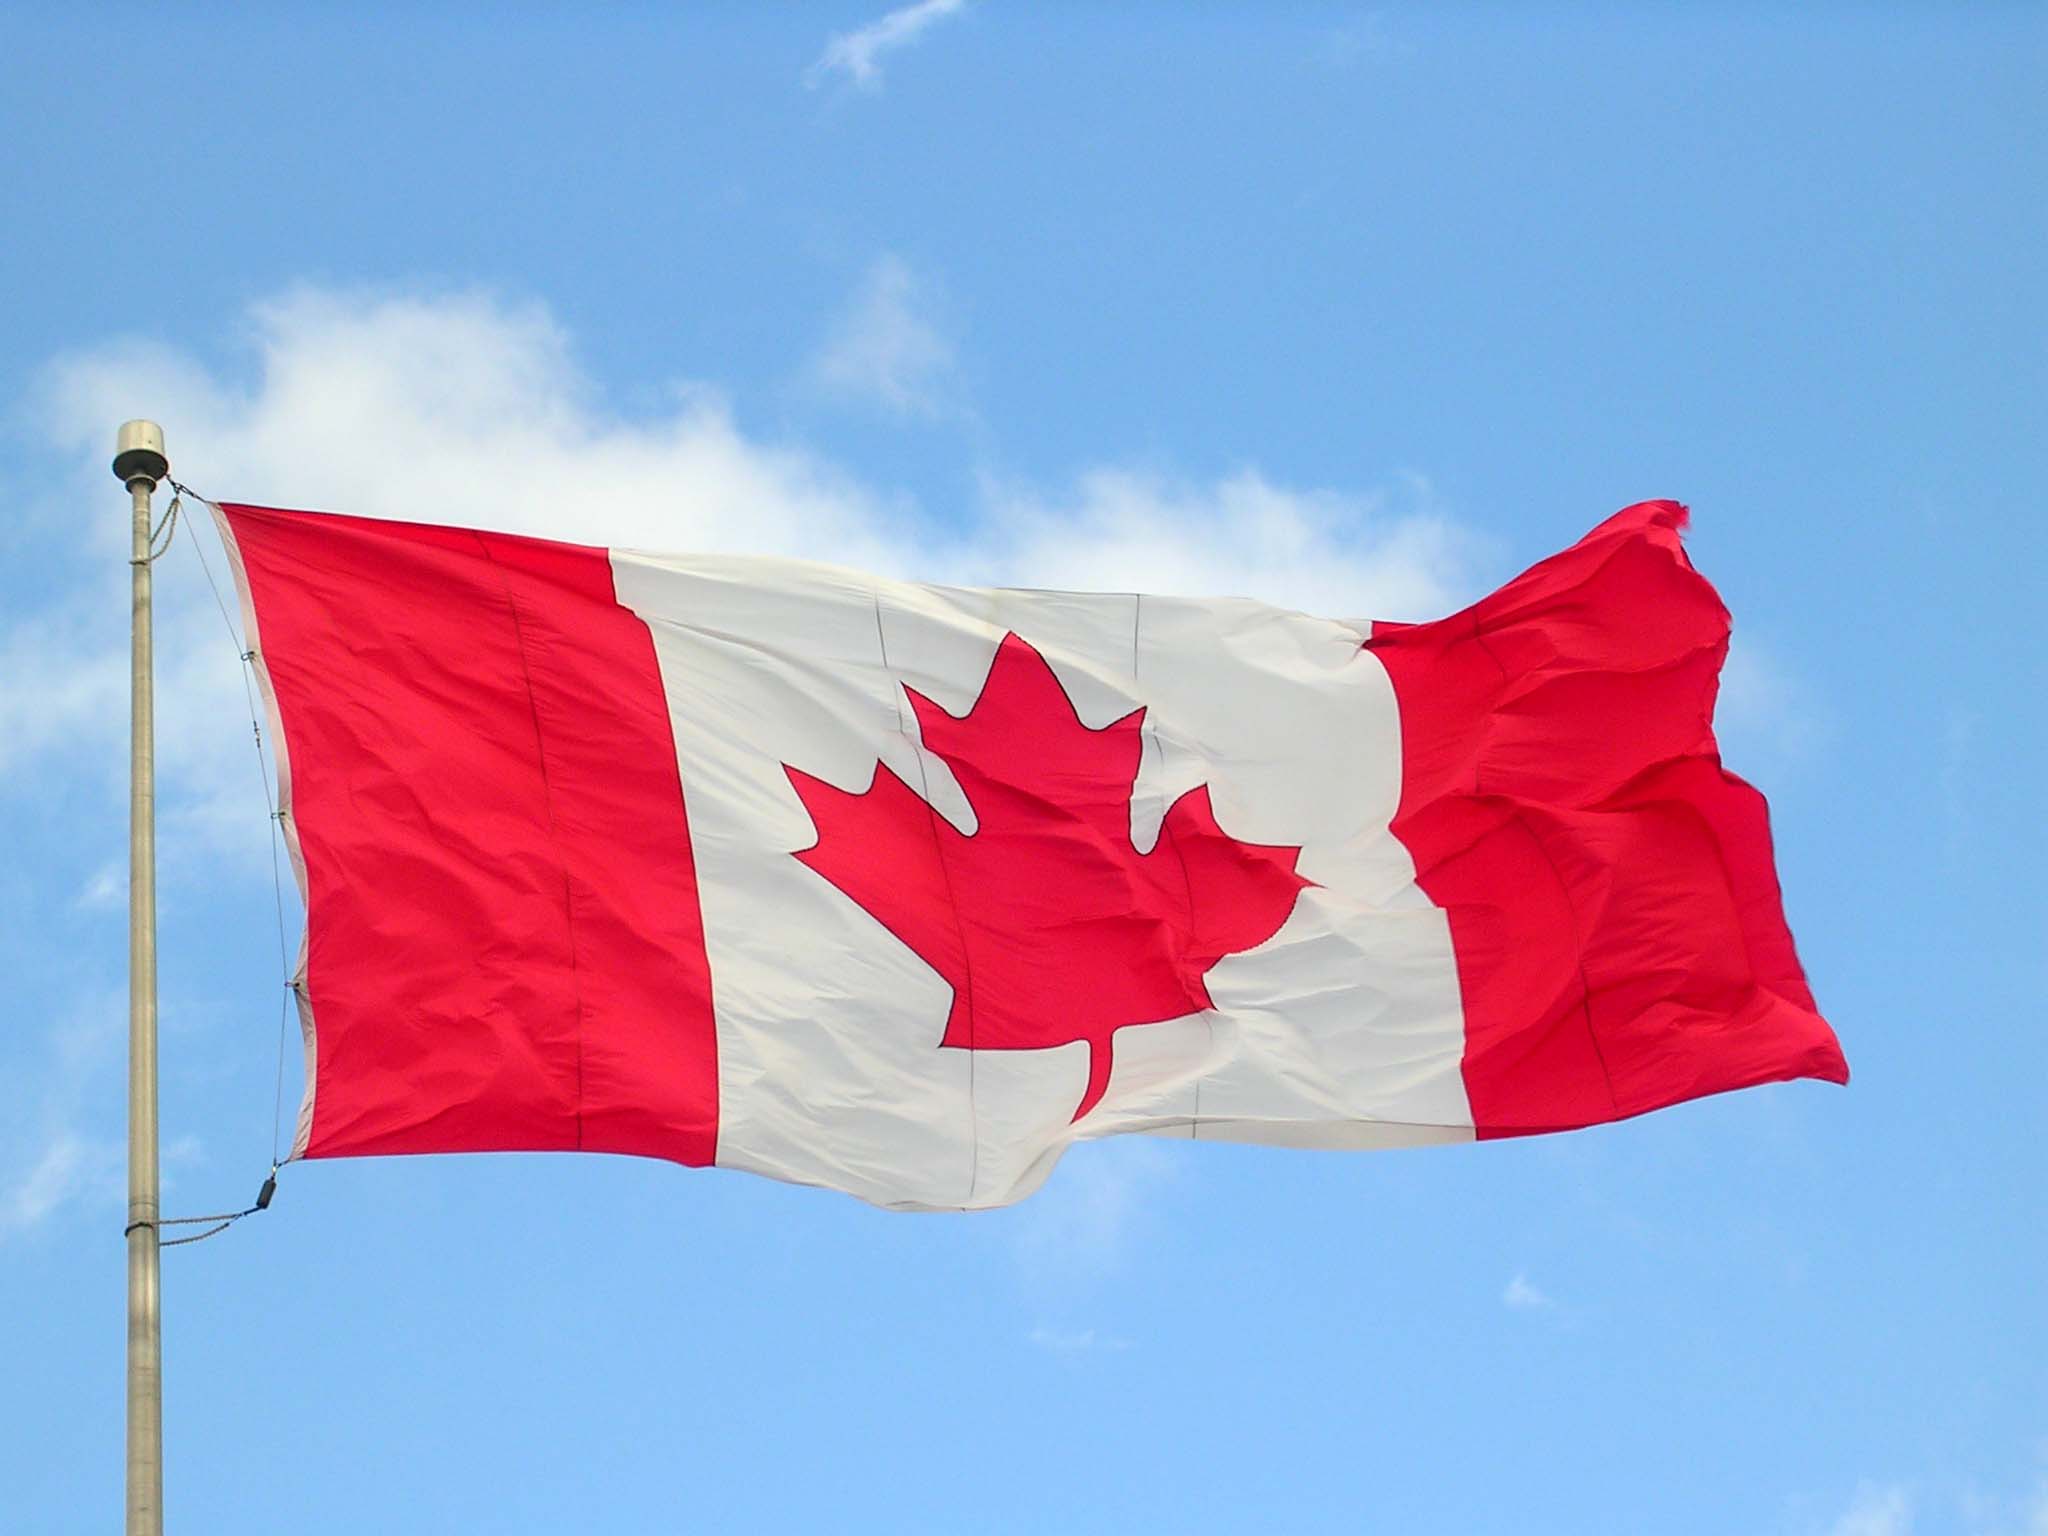
Another fun activity during our Canada Unit was to learn about different Canadian symbols. During this portion of our unit we had the chance to read various books, gain exposure to provincial flags and the Canada Flag. Students also had the opportunity to be creative and design their own Canadian Symbol and as well as complete a writing activity explaining their reasoning for the design.
Mapping
During our mapping section students learnt about mapping features. To make mapping more experiential and hands on I provided the students the opportunity to create their own map on a piece of thick construction type paper. When they completed creating the map “blueprint” I covered their maps with wax paper, and gave them candy and icing and had them transform their drawings into 3D candy maps. The candy provided was blue whales to be placed in the Oceans, candy mint leaves to make a forest, marshmallows for mountains, chocolate chips for rocks, cookies to make land, and assorted candies. Also the students used blue cool-aid to sprinkle and make rivers and lakes with.
Criteria- The maps must include:
- a lake
- a river
- an ocean
- an island
- a mountain
- a compass
- forest
Overall this was very successful, the students were engaged, loved learning in a hands on manner, could explain their map and the decisions they made, in addition to what each candy represented. The final creations were fantastic, and of course tasted very yummy.
(Teacher Tip: get students to make the final copy of their map in felt as pencil and pen are difficult to see through wax paper, provide coloured paper for more details or other materials besides candy to decorate. This same activity could be done with modelling clay or playdough as an alternative)
Math Measurement
For our measurement unit, I found it helpful to give students a visual and hands on way of understanding the math measurement vocabulary Area and Perimeter. I taught this lesson in a fun and hands on manner, we decorated cookies! Students demonstrated putting icing covering the area of their cookie, as well as the perimeter of the cookie. A simple demonstration and activity allowed the students to grasp this concept, it was a memorable experience and students were able to refer to this experience later when recalling math vocabulary.
 (Teacher Tip: You can extend the activity by getting the students to create the cookies, and measure from scratch, or to speed up the process, pre-made cookies work well, give each student their own popsicle stick to ice cookie, and have teacher hand out icing to prevent double dipping. Take pictures of the process for assessment purposes, learning journals, and creation of vocabulary flashcards)
Art Activities
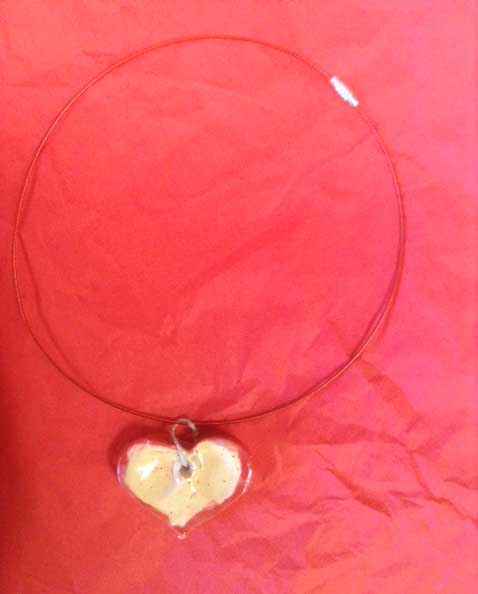
One fun activity I tried with my students was making pendants out of clay. We made these for Mother’s Day, it could easily be adjusted for other occasions or simply just an art project. Each student needs a small ball of clay, get them to roll it out flat and use a cookie cutter to stamp out a heart, or other desired shape. Make sure the clay is thick enough so that when pressed into the clay, the clay rises to the very top lip of the cookie cutter. Keep the cookie cutter on the shape and get the student to stamp their finger prints in. Teacher tip, don’t remove the cookie cutter from the clay until after prints or the students design in clay has been completed because pressing down on the clay without it makes it quickly loose its shape. Next use a straw to poke through and create a hole for the necklace or string to go through, make sure its not too close to the edge as it can crack in the kiln or slight wear. When we did this project we put our hearts in the kiln and then added paint and re-fired. If you don’t have a kiln, or enough time, pick clay that doesn’t need to be fired, use acrylic paint, and when it is dry give it a coat of mod podge. The final product looks just as great, and the mod podge makes it nice and glossy and seals it all together. This pendant works great on a necklace, but also makes a neat keychain on plastic lacing. Overall a fun project and a great looking final result, a must try for your next clay lesson. (Teacher tip: this took at least a week to cut shapes, let dry, put in kiln, paint, dry, put in kiln, string necklace, and wrap present. Also make a few extra clay pendants as backups as they can break in the kiln, or if dropped in the classroom, in a class of 22 students I needed 4 extra. Don't forget to make extrafor students who are away)
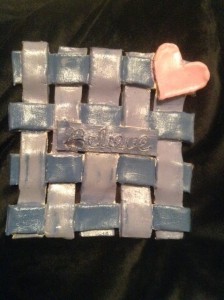
 Clay art, try new techniques like weaving. A wonderful example to inspire creativity and hands on activity. Tip: you don't always have to glaze the projects. I ran out of time to put into the kiln again with the final shiny glaze. Due to time constraints I ended up just using acrylic paint and sealed it with mod podge. I was happy with the final product.
I introduced students to each Canadian Animal, showed them photos, shared a few basic facts, and short clips. The students then made a list in order from most interested to least interested animal to study. I then collected the preferences and created groups. Students were given specific animal booklets, baskets of age and skill level appropriate resources, and were taught basic research skills. Students were given a day to explore and read materials and personalize the front page of the booklets. The next few days students were in charge of reading the books and finding research facts they wanted to record in large grid paper boxes. One day would be devoted to finding food facts, habitat facts, appearance facts, fun facts, or what they thought was important. Another day we cut up our facts and sorted and glued them down to a facts sheet. Other days we used our facts to formulate sentences to record in our booklets. We also used our research materials and photographs to illustrate the booklets. The final product was around 4 complete sentences per page regarding the question or topic. The students were engaged throughout the process, and it was beneficial for them to learn and demonstrate research skills, sorting facts into categories and like ideas, and formulating complete sentences. The students were motivated because they were learning facts that interested them, an all time favourite was finding facts to go in the fun facts section, and sharing these with peers during our snowball activity. During the snowball activity, students wrote a Who Am I question: Example I have two talons instead of feet, and bald head of white feathers. Who am I? Answer: Bald Eagle. Next step was for them to write the answer on the back and crumple the question up. They then were able to toss them into the center of the class, and go retrieve a snowball. Students took turns reading and guessing, we had some great laughs as a class. (Teacher note, remind class the Who am I animals picked for the game clues must be one of the animals researched in class).
Animal Habitat Artwork Project
One of the students favourite experiential education activities was going on a walkabout around the school yard to find habitat materials. Students were given ziplocks and instructed to find materials that could be used to recreate their animals natural habitat, ie sticks, grass, leaves, pebbles etc. Through a class discussion we made rules that indicated we would not collect living materials, we would only collect items that were already on the ground. After our walkabout using our senses and hands on learning. We created our habitats in the classroom on thick poster board, and lots of white school glue. (Teacher tip, the more white glue the better, apply liberally with a paintbrush, or dribble over top of habitat later, it dries clear,. The more the better if you want to hang on bulletin boards.) Later in the week we made small water colour animal paintings to put on pop ups and add to our habitats. The final product looked very natural and brought a lot of depth and character to our Animal Research bulletin board. The students had a lot of fun, and connected and demonstrated research skills and knowledge with this hands-on art project.
Canada Unit
During my Canada Unit one of the students favorite activity was singing Canada in my Pocket, we even had the opportunity to add actions to our song and perform it for others. If you have a primary class, I would highly suggest integrating this song into your classroom activities.
Check out the following Youtube video:
Another fun activity during our Canada Unit was to learn about different Canadian symbols. During this portion of our unit we had the chance to read various books, gain exposure to provincial flags and the Canada Flag. Students also had the opportunity to be creative and design their own Canadian Symbol and as well as complete a writing activity explaining their reasoning for the design.
Mapping
During our mapping section students learnt about mapping features. To make mapping more experiential and hands on I provided the students the opportunity to create their own map on a piece of thick construction type paper. When they completed creating the map “blueprint” I covered their maps with wax paper, and gave them candy and icing and had them transform their drawings into 3D candy maps. The candy provided was blue whales to be placed in the Oceans, candy mint leaves to make a forest, marshmallows for mountains, chocolate chips for rocks, cookies to make land, and assorted candies. Also the students used blue cool-aid to sprinkle and make rivers and lakes with.
Criteria- The maps must include:
- a lake
- a river
- an ocean
- an island
- a mountain
- a compass
- forest
Overall this was very successful, the students were engaged, loved learning in a hands on manner, could explain their map and the decisions they made, in addition to what each candy represented. The final creations were fantastic, and of course tasted very yummy.
(Teacher Tip: get students to make the final copy of their map in felt as pencil and pen are difficult to see through wax paper, provide coloured paper for more details or other materials besides candy to decorate. This same activity could be done with modelling clay or playdough as an alternative)
Math Measurement
For our measurement unit, I found it helpful to give students a visual and hands on way of understanding the math measurement vocabulary Area and Perimeter. I taught this lesson in a fun and hands on manner, we decorated cookies! Students demonstrated putting icing covering the area of their cookie, as well as the perimeter of the cookie. A simple demonstration and activity allowed the students to grasp this concept, it was a memorable experience and students were able to refer to this experience later when recalling math vocabulary.
(Teacher Tip: You can extend the activity by getting the students to create the cookies, and measure from scratch, or to speed up the process, pre-made cookies work well, give each student their own popsicle stick to ice cookie, and have teacher hand out icing to prevent double dipping. Take pictures of the process for assessment purposes, learning journals, and creation of vocabulary flashcards)
Art Activities
One fun activity I tried with my students was making pendants out of clay. We made these for Mother’s Day, it could easily be adjusted for other occasions or simply just an art project. Each student needs a small ball of clay, get them to roll it out flat and use a cookie cutter to stamp out a heart, or other desired shape. Make sure the clay is thick enough so that when pressed into the clay, the clay rises to the very top lip of the cookie cutter. Keep the cookie cutter on the shape and get the student to stamp their finger prints in. Teacher tip, don’t remove the cookie cutter from the clay until after prints or the students design in clay has been completed because pressing down on the clay without it makes it quickly loose its shape. Next use a straw to poke through and create a hole for the necklace or string to go through, make sure its not too close to the edge as it can crack in the kiln or slight wear. When we did this project we put our hearts in the kiln and then added paint and re-fired. If you don’t have a kiln, or enough time, pick clay that doesn’t need to be fired, use acrylic paint, and when it is dry give it a coat of mod podge. The final product looks just as great, and the mod podge makes it nice and glossy and seals it all together. This pendant works great on a necklace, but also makes a neat keychain on plastic lacing. Overall a fun project and a great looking final result, a must try for your next clay lesson. (Teacher tip: this took at least a week to cut shapes, let dry, put in kiln, paint, dry, put in kiln, string necklace, and wrap present. Also make a few extra clay pendants as backups as they can break in the kiln, or if dropped in the classroom, in a class of 22 students I needed 4 extra. Don't forget to make extrafor students who are away)
Clay art, try new techniques like weaving. A wonderful example to inspire creativity and hands on activity. Tip: you don't always have to glaze the projects. I ran out of time to put into the kiln again with the final shiny glaze. Due to time constraints I ended up just using acrylic paint and sealed it with mod podge. I was happy with the final product.

No comments:
Post a Comment